As whoever is still following this blog must have realised until now, regular posts is not my strong point! However, I fortunatelly have some progress to report, although intermittent.
There are many reasons for this, the main being that my family is moving from Heraclion to the nearby city of Rethymnon but there is no point in getting you bored.
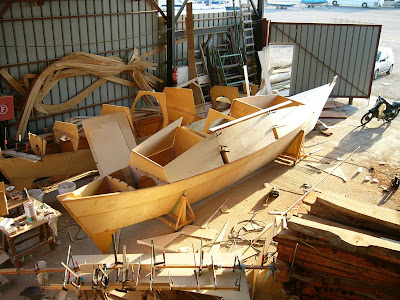
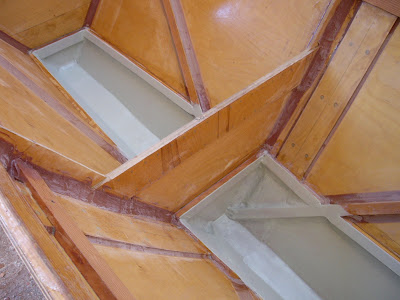
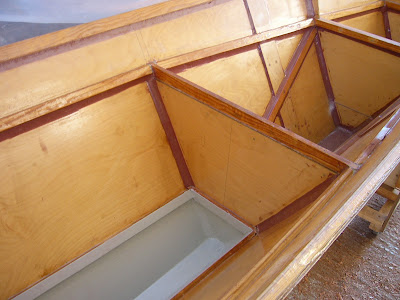
The following photos are representative of the delay in the progress of work on the starboard hull....a new 13,5 m Kaique is emerging right next to it as I am struggling to complete the cabin tops. Anyway, I am happy with my modifications and the shape of what might be the second (as far as I know) Tiki 31 with completely enclosed central cockpits (the first one being Lookfar). Beamthroughs also turned out well and seem extremely sturdy. I ended up using a second semi-bulkhead for each beamthrough, extending down to what should be the cockpit floor, according to the original plans. A framework of deckbeams are glued on the two bulkheads, supporting the "deck" of the through, which is then filleted and glassed. An opening in the semi-bulkhead permits the inspection of the framework and underside of the deck of the beamthrough from within the central cabin.
Decks, forward and rear, are also prepared and installed and there has been some progress on the port hull as well.
I have a couple of months until I will no longer be a resident of Heraclion. Until that time I will do my best to complete as many tasks on the boat as possible. Then I will have to decide if I will leave her where she stands until she is finished (this means I will have to drive for an hour to work on her) or if I will move her for the second time and find a place in Rethymnon to finish her. I think the final decision will depend on the progress of the boat at the time I will have to leave. We will see...

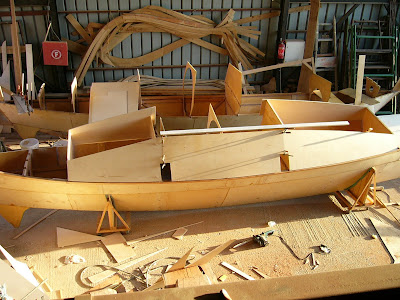
cabinsides are being cut and installed
Port hull progress. The floors and bunks are also ready for installation
Deckbeam and deck preparation


